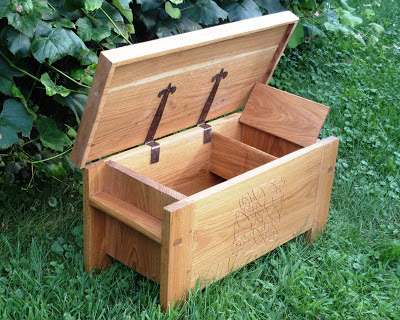
Ive been making lots of boxes lately, most of them carved, bible box style boxes. But I havent fit a till in one for a while. I had to look back to find the last one I built, it was for the Medieval Style Hutch Chest I built a little over two years ago.
 That one had a lid, fixed with pin hinges. This time I was forgoing the lid. But I still had to make the stopped dados for the till.
Like everything, it starts with the layout.
 First I measured and penciled in for the 1/2" dados. There is no secret or magic to the layout, I played with a couple 1/2" wide pieces of scrap until the spacing felt right.
 I have been getting to like laying things out with a marking knife more and more. I started using them because I had read many woodworkers I respect write about how wonderful and accurate they were, but it was a tougher sell for me. I would start using the knife and before too long in a project, I would switch back to my trusty mechanical pencil.
I am up to about 60% knife and maybe 40% pencil. I still like to scribble in my waste area so the pencil is always near anyway.
.JPG)
After setting the lines with the knife I deepened the walls with a wide chisel. Often I would saw the walls down with a stair saw or sometimes a back saw but because of the stopped dado nature of the vertical till side, this was the way to go.
.JPG)
After setting the walls I used my big 1/2" mortise chisel to chunk out some of the waste.

Then I cleaned down the rest of the way with my router plane.
.JPG)
I was worried about some serious chip out with this wild grain. I ended up with some, but better than I was worried about.
I took a straight grained piece of red oak and broke it down to 1/2" thick using the band saw and bench planes.
.JPG)
I rabbeted the bottom of the till wall to house the bottom. This makes a nice corner on the inside that wont gap and allow small things to fall through.
 Everything ripped and fit to size.
.JPG) A while back I started writing on my work, but not like you think. I started writing in places that no one can see. I write on the inside faces of joinery, behind moldings, and in other odd places. Thos. Moser got me started after I read a passage in his book about him doing the same thing. I wrote about the idea HERE. Its putting just a little more of myself into the work. This piece, being for my daughter was no exception. I took the chance to write a whole letter on the bottom of the till, on the underside. I also wrote in the rabbet.
A while back I started writing on my work, but not like you think. I started writing in places that no one can see. I write on the inside faces of joinery, behind moldings, and in other odd places. Thos. Moser got me started after I read a passage in his book about him doing the same thing. I wrote about the idea HERE. Its putting just a little more of myself into the work. This piece, being for my daughter was no exception. I took the chance to write a whole letter on the bottom of the till, on the underside. I also wrote in the rabbet. Once the dovetails are glued up with the till wall and bottom sandwiched in place . . .
 . . . and the bottom is nailed on. No one will see those words until the piece falls apart. That should be a long time from now. But Chloe knows its there, in fact she asked me about it. "Did you write something inside this one Dad?"
You bet I did.
 With the pine bottom nailed in place it was just a matter of planing it and the proud parts of the dovetails down flush with the sides.
Ratione et Passionis
Oldwolf

0 komentar:
Posting Komentar